If you need to print this PDF or save for later
click below to download your copy.
[button size=”medium” style=”secondary” text=”Download PDF” link=”https://vetovation.com/wp-content/uploads/2020/09/Sterlink-FPS-EN-User-Manual-Rev03-January-2019-NEW-Copy.pdf” target=”none”]
FPS-15s Plus (FPS-15s+)
User Manual
Low-temperature plasma sterilizer
by Plasmapp Co., Ltd.
Distributed by Vetovation Inc.
Revised in Jan. 2019
Contents
1. Safety information
1.1 Personal safety and first aid
1.2 Personal protective equipment
1.3 Warning, cautions, and note
1.4 Symbols
2. Sterilizer overview
2.1 Intended use
2.2 Sterilization procedure
2.3 Sterilization cycle
2.4 Sterilizer system and accessories
2.5 Sterilant cassettes
3. Load preparation
3.1 Indications for use
3.2 What can be sterilized
3.3 Items not to be processed
3.4 Guidelines for preparing items to be sterilized
3.5 Cleaning, rinsing, and drying
3.6 Packaging and loading
3.6.1.Instrument tray
3.6.2 Tray mats
3.6.3 Packaging
3.6.4 Loading
4. Operation
4.1 Before you start
4.2 Start and warm-up
4.3 Preparing the load
4.4 Cassette Loading
4.5 Starting sterilization cycle
4.6 Cycle in progress and completed
4.7 Cancelling sterilization cycle
4.8 Processing a sterilized load
4.8.1 Inspecting chemical indicator
4.8.2 Processing self-contained biological indicator
5. Access levels and supervisor tasks
5.1 Overview
5.2 Access levels
5.3 Additional utility menu
6. Reports and files
6.1 Reports
6.2 Data
7. Maintenance
7.1 Manual maintenance
7.1.1 Cleaning the sterilizer exterior and interior chamber
7.1.2 Replacing label-printer paper
7.1.3 Routine sterilizer maintenance
7.2 Sterilant cassettes
7.3 Moving, long term stop and disposal of the sterilizer
8. Troubleshooting
8.1 System features
8.2 Software update
8.3 User errors
8.4 Sterilant cassette errors
8.5 Other system errors
8.6 Contact information
Attachment A. Warranty
Attachment B. Sterilant Cassettes, Consumables, Tray and Accessories
Attachment C. Specifications
Chapter 1. Safety information
Your safety is the primary concern of Plasmapp Co., Ltd. and this chapter provides information on safely using the gas plasma sterilizer system. You must read and understand the safety information and instruction given in this chapter before operating the sterilizer. Always pay attention to the warnings, cautions and notes throughout this User manual. This information is for your safety and will make sure that you receive the best result from the safe operation of your sterilizer system.
1.1 Personal safety and first aid

WARNING! HYDROGEN PEROXIDE IS CORROSIVE.
Concentrated hydrogen peroxide is corrosive to skin, eyes, nose, throat, lungs, and the gastrointestinal tract. Always wear latex, PVC (vinyl), or nitrile gloves while removing items from the sterilizer following any cancelled cycle or error occurrence. Residual hydrogen peroxide may be present. If the contact occurs, immediately flush skin with large amounts of water. If symptoms are severe or persist, consult a doctor immediately.

WARNING! HYDROGEN PEROXIDE IS AN OXIDIZER.
Avoid allowing hydrogen peroxide to contact organic materials, including paper, cotton, wood, or lubricants. Concentrated hydrogen peroxide is a strong oxidizer and may react with organic materials, causing ignition and fire.
WARNING! RISK OF EYE INJURY.
Direct hydrogen peroxide contact with eyes can cause irreversible tissue damage. If there is a contact with eyes, immediately rinse eyes thoroughly with a large amount of water. Consult a physician immediately.
 WARNING! RISK OF SKIN INJURY.
Direct contact between the skin and hydrogen peroxide can cause severe irritation. If the contact occurs, immediately flush skin with large amounts of water. If symptoms are severe or persist, consult a physician immediately.
WARNING! RISK OF RESPIRATORY IRRITATION.
Inhalation of hydrogen peroxide mist can cause severe irritation of lungs, throat, and nose. If you inhale it, move to fresh air. Please consult a doctor immediately if the symptoms are severe or persist.
 WARNING! CONCENTRATED HYDROGEN PEROXIDE IS TOXIC.
Ingestion of hydrogen peroxide may be life-threatening. If swallowed, drink plenty of water immediately to dilute. Do not try to induce vomiting. Please consult a doctor immediately if the symptoms are severe or persist.
 WARNING! STERILIZATION SURFACES.
At the end of a cycle, the interior of the sterilizer may be hot. Do not touch the inside of the chamber or door with your bare or gloved hands. Allow the sterilizer to cool before touching interior surfaces.
1.2 Personal protective equipment
 CAUTION! HYDROGEN PEROXIDE MAY BE PRESENT.
Wear latex, PVC (vinyl), or nitrile gloves whenever handling a load after a cycle cancellation or error occurrence. Hydrogen peroxide liquid may be present on the load or in the chamber.
1.3 Warnings, cautions, and notes

Warnings and cautions are accompanied by symbols surrounded by a triangle and are printed in the text in boldface italics. Warnings indicate events or conditions that can result in serious injury or death. Cautions indicate events or conditions that can result in severe damage to the equipment.
Notes are accompanied by a check mark and are printed in italics. Notes highlight specific information about the proper use and maintenance of the STERLINKⓇ FPS- 15s Plus Sterilizer system.
1.4 Symbols
HOT SURFACES PRESENT.
Do not touch without protection.
HAZARDOUS CHEMICAL PRESENT.
Use personal protective equipment.
TOXIC CHEMICAL PRESENT.
Avoid exposure, contact, or ingestion.
 HAND CRUSH HAZARD.
Keep hands clear while operating.
Chapter 2. Sterilizer overview
2.1 Intended use
The STERLINK® FPS-15s Plus sterilization system is a low temperature gas plasma sterilizer to inactivate microorganisms for a broad range of metal and nonmetal medical devices and surgical instruments at low temperature. This sterilizer offers an effective, safe, fast, economical, easy–to- use, reliable, and flexible sterilization method.
When used as directed by the instruction in this User manual, please review the Chapter 4 “Load preparation” chapter in which recommended materials and lumen sizes are described. When selecting reusable medical devices to be processed in this sterilizer system, reprocessing information should be obtained from the manufacturer of the medical device in accordance with international norms (such as ISO 17664 or AAMI TIR 12).
2.2 Sterilization procedure
As a medical professional, you may already be familiar with general sterilization principles. However, the STERLINK® FPS-15s Plus sterilizer utilize its own method, and it requires special attention to the ways in which it differs from other conventional sterilizers.
The STERLINK® FPS-15s Plus sterilizer can sterilize medical devices by diffusing hydrogen peroxide vapor into the chamber or pouch. It rapidly sterilizes medical instruments and materials without leaving toxic residues. All stages of the plasma sterilization cycle are not damaged to compatible instruments which are sensitive to heat and moisture.
The STERLINK® FPS-15s Plus sterilizer can be used for metal and non-metal medical devices and can sterilize instruments that have difficult-to-reach (diffusion-restricted) spaces, such as hinges on forceps. Please refer to “Load preparation” chapter for more information.
The sterilizer consistently provides the Sterility Assurance Level (SAL) of 10-6, as defined by U.S. Food and Drug Administration (FDA) and international standards, for clinical use on all allowed substrates within the limits of the claims for materials and geometries when used in accordance with the directions in this User manual.
The devices have been pre-validated to the SAL of 10-6 based upon worst-case conditions, including lumens within the claim lengths and mated surfaces. If additional technical information concerning validation is needed, please contact Plasmapp or your local Plasmapp customer support representative.
2.3 Sterilization cycle
The STERLINK® FPS-15s Plus sterilizer is designed to be operated at two different modes, and each mode is the combined cycle of the Smart Ready (SRTM), Sterilization and Smart Complete (SCTM) process. The plasma sterilizers system is designed to operate only with the sterilant cassettes of STERPACK®, STERPACK® Plus and STERLOAD®. Each cassette has individual barcode which is scanned by the sterilizer to start the sterilization cycle automatically according to the barcode identifying the type of the cassettes. This automatic scan step reduces user error and the reliability of sterilization.
The optimized heating and drying process is provided in the SRTM process by measuring volume of the medical devices and residual water left on the devices in which the pressure of the pouch and chamber is independently controlled to obtain the venting and pumping pressure curves.
The sterilization process consists of the two consecutive identical phases, and the critical process parameters are controlled to be identical. The validation of the sterilization process is performed by using the half-cycle overkill method to demonstrate the 10-6 SAL. In the SCTM process the sterilizing agent is removed before using the sterilized medical devices to maintain the asepsis. To ensure user safety we use an independent pressure sensor of the sterilizer to measure the residual sterilant and perform an optimized completion process. The following table provides a brief description for each cycle mode.
Sterilization cycle and minimum time by mode
|
Mode |
Sterilant cassette |
Cycle and minimum cycle time (unit: min) |
||
|
SRTM / SCTM |
Sterilization |
Total |
||
|
POUCH |
STERPACKⓇ |
3 |
4 |
7 |
|
POUCH Plus |
STERPACKⓇPlus |
6 |
8 |
14 |
|
CHAMBER |
STERLOADⓇ |
21 |
15 |
36 |
Sterilization process – Phase 1
- Injection: The hydrogen peroxide is transferred from the cassette into the vaporizer and chamber of pouch. Specially in the Pouch mode, the injection is done directly in the pouch to maximize the efficiency of sterilization, quick sterilization process is possible within 10 minutes.
- Diffusion: Pressure in the chamber or pouch is increased in order to apply hydrogen peroxide to the surfaces of the devices and into the lumens of the load.
- Plasma purification / Vacuuming: The pressure within the chamber or pouch is reduced to remove air and residual sterilant and water. The plasma power is applied to the plasma source to purify residual hydrogen peroxide vapor. Specially in the Pouch mode, it is possible to complete the quick sterilization process by directly removing the sterilizing agent from the pouch.
Sterilization process – Phase 2
The steps in the Phase 1 are repeated.
2.4 Sterilizer system and accessories
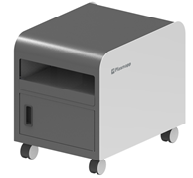
The STERLINK® FPS-15s Plus sterilization system has accessories of the sterilizer cart and label-printer. The following figure shows the complete sterilizer system including the accessories.

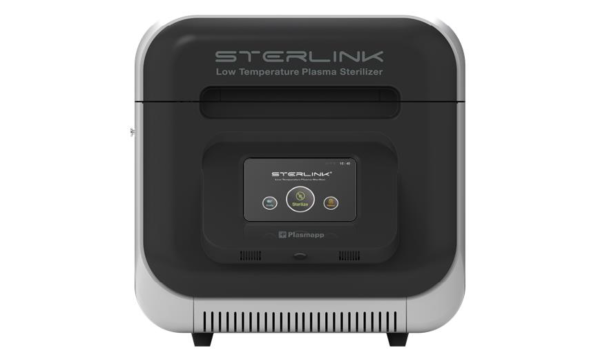
Figure 3.1 STERLINK® FPS-15s Plus sterilization system
The STERLINK® FPS-15s Plus sterilization system can be utilized with the optional label-printer in order for the user to print the reports summarizing sterilization cycle information. This label- printer prints as sticker type the report for user convenience to manage the history of cycle information.

Figure 3.2 STERLINK® FPS-15s Plus sterilizer
The printer is designed to be connected to the USB print connector on the rear side of the sterilizer. For the detailed information about the report, please refer to the Chapter 7 featuring “Reports and Data”.

Figure 3.3 Label-printer for STERLINK® FPS-15s Plus sterilization system
2.5 Sterilant cassettes
The STERLINK® FPS-15s Plus system has three different modes (POUCH, POUCH Plus and CHAMBER mode) which are automatically initiated by using the barcoded printed on the sterilant cassettes of STERPACK®, STERPACK® Plus and STERLOAD®, respectively. The barcode contains information of the type and date of manufacture of the sterilant cassette.

Figure 3.4 Sterilant cassette of STERPACK®

Figure 3.5 Sterilant cassette of STERPACK® Plus
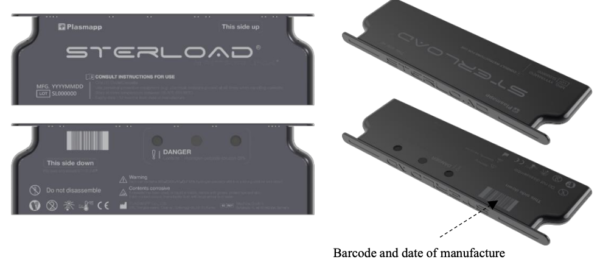
Figure 3.6 Sterilant cassette of STERLOAD®
Each cassette has two cells of sterilant which contain precisely measured amounts of hydrogen peroxide solution, and the two cells are used for repeating the same sterilization phases for one sterilization cycle. When the sterilization cycle is completed or stopped, the used cassettes should be handled with wearing protective gloves and have to be disposed according the right regulation. Please refer to the Chapter 5 featuring “Operation” to have more information on how to use the cassette.
 CAUTION! CHECK EXPIRY DATE.
When you use the sterilant cassettes (STERPACK®, STERPACK® Plus, STERLOAD®), check the expiry date. If the date is expired, dispose and use new available sterilant cassettes.
CAUTION! HYDROGEN PEROXIDE MAY BE PRESENT.
Wear latex, PVC (vinyl), or nitrile gloves whenever handling a load after a cycle cancellation or error occurrence. Hydrogen peroxide liquid may be present on the load or in the chamber.
Chapter 3. Load preparation
3.1 Indications for use
The STERLINK® FPS-15s Plus sterilizer is designed for sterilization of both metal and nonmetal medical devices at low temperatures. The plasma sterilization process is a multiphase sterilization process that utilizes a combination of exposure to hydrogen peroxide vapor and plasma to complete the sterilization cycle.
The sterilizer can sterilize instruments which have diffusion-restricted spaces, such as the hinged portion of forceps and scissors. Medical devices with the following materials and dimensions can be processed in the STERLINK® FPS-15s Plus sterilization cycles:
- Single-channel stainless steel lumens with an inside diameter of 0.7 mm or larger and a length of 500 mm or shorter.
- Single-channel stainless steel lumens with an inside diameter of 2 mm or larger and a length of 1,500 mm or shorter.
- Single-channel Teflon/PTFE lumens with an inside diameter of 1 mm or larger and a length of 2,000 mm or shorter.
CAUTION! KNOW WHAT YOU CAN PROCESS.
Before processing items in the sterilizer, make sure you know how the STERLINK® FPS-15s Plus sterilization process will affect the items. If you have questions, or if you are in doubt about the materials in your device, contact the medical device manufacturer or your local Plasmapp customer support representative for more information.
CAUTION! RISK OF WARRANTY VIOLATION.
Improper processing may limit liability for damage to processed instruments. The manufacturer can not warrant the damage of the instruments due to improper use.
The STERLINK® FPS-15s Plus sterilizer is compatible for sterilizing the non-invasive and invasive medical devices, such as denture, endoscopes, ocular prosthesis, intraosseous transcutaneous amputation prosthesis, and surgical equipment.
3.2 What can be sterilized
The STERLINK® FPS-15s Plus sterilization system is classified as Class IIb according to MDD 93/42/EEC and the system is intended to be used to disinfect medical devices including invasive devices.
There are a wide variety of materials and devices that can be sterilized in the STERLINK® FPS- 15s Plus sterilizer. As more manufactures complete testing of their products with the sterilizer, the list of compatible items continues to expand. Information will be updated as new information becomes available. If the user has any doubt, please contact the medical device manufacturer.
CAUTION! RISK OF DAMAGE ON THE LOAD OR STERILIZER.
Do not attempt to sterilize items or materials that do not comply with the guidelines specified in this User manual. Consult the medical device manufacturer’s instructions or call your local Plasmapp customer support representative to determine whether an item can be sterilized by the STERLINK® FPS-15s Plus sterilization system.
3.3 Items not to be processed
The following items should not be processed by the STERLINK® FPS-15s Plus sterilization system.
- Single use items for which the manufacturer does not recommend re-use.
- Liquid and powders.
- Items or materials that absorb liquids.
- Items made of materials that contain cellulose, such as cotton, paper or cardboard, linens, buck towels, gauze sponges, or any item containing wood pulp.
- Paper instrument count sheets or lot stickers.
- Items with mated Nylon® surfaces.
- Instruments and devices that cannot withstand a vacuum and are labeled for gravity stream sterilization method only.
- Items whose design permits the surfaces to collapse onto each other unless some method is used to keep the surfaces separated.
- Dead-end lumens must not be processed.
- Other instruments for which the manufacturer has not specifically recommended sterilization in the STERLINK® Sterilizer.
3.4 Guidelines for preparing items to be sterilized
All items must be cleaned, rinsed, and thoroughly dried before being placed in the STERLINK® FPS-15s Plus sterilizer. Loads containing too much moisture may result an automatic cycle cancellation.
3.5 Cleaning, rinsing, and drying
The cleaning and sterilization are two separated processes. As with all sterilization methods, proper cleaning of instruments and devices is a critical and necessary step prior to sterilization. All items must be cleaned, rinsed, and thoroughly dried before loading into the sterilizer.
Carefully inspect all instruments and devices for cleanliness and dryness and for flaws or damage prior to packaging. If visible soil or moisture is present, the item mush be re-cleaned and dried prior to sterilization. Devices and instruments with flaws or damages should be replaced or repaired before using.
The process of cleaning is necessary to remove organic and inorganic soil and debris from medical equipment. In this process, majority of micro-organisms are removed from the surface of the items. The process of sterilization inactivates all remaining spores and live micro-organisms.
Notes.
- Remove all blood, tissue, and soil from items by following the device manufacturer’s instructions using an appropriate detergent or cleanser.
- Rinse items thoroughly to remove detergent or cleanser residue.
- Dry all items thoroughly. An acceptable method for drying is to blow compressed gas through the lumen until no moisture exits the distal end of the device. Please ensure that any method used to dry the devices is in accordance with the manufacturer’s instructions for use or contact the device manufacturer to obtain appropriate and safe procedures. It is necessary to remove moisture from all parts of the items. Only dry items should be loaded into the sterilization chamber to prevent cycle cancellation.
- Some complex re-usable medical devices may require disassembly for proper cleaning and sterilization. It is very important that you follow the device manufacturer’s recommendations concerning cleaning and sterilization.
- Periodic careful inspection of items after repeated exposure to disinfectant / cleaner / sterilant is necessary, regarding the potential damage of the chemical agent to the items.
3.6 Packaging and loading
If you choose to package the instruments, proper preparation of trays, pouches, and instruments can minimize the possibility of the cycle cancellations and positive biological indicator (BI) results due to load-related problems. All instruments must be cleaned, rinsed, and thoroughly dried before loading into the sterilizer.
3.6.1 Instrument trays
Only STERLINK® instrument trays and accessories are recommended for use in the STERLINK® FPS-15s Plus sterilizer. These instrument trays specially designed to allow diffusion of hydrogen peroxide. If you don’t use the vacuum-designed tray in Pouch mode, the sterilization cycle can be canceled due to the damage of pouch film.
3.6.2 Tray mats
Instrument trays should only be padded with polypropylene sterilization warp. Never use linen, cellulose, or any materials in the “Items not to be processed” section. The foam pads should not be used in instrument trays since they may absorb the hydrogen peroxide.
3.6.3 Packaging
Packaging should be performed as follows.
- Use only STERPACK® and STERPACK® Plus for POUCH and POUCH Plus mode according to the size of the medical instrument.
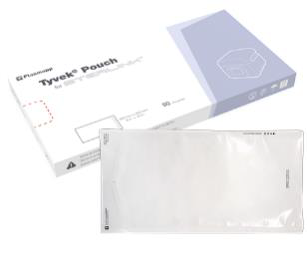
- Use only polypropylene sterilization wrap or Tyvek® pouches for the CHAMBER mode operation.
- Do not use paper pouches or sterilization wraps containing cellulose or cotton.
- Do not use any wraps or packaging that are not approved by Plasmapp Co., Ltd. or materials on the “Items not to be processed” section.
- Arrange the items in a tray to ensure proper diffusion of hydrogen peroxide throughout the load.
- Place peel pouches on edge, if possible. Arrange them so that the transparent side of a pouch faces the opaque side of the next pouch. Do not stack pouches on top of each other.
- Do not stack instruments inside the trays. Do not stack trays. Do not stack trays within trays. Do not wrap instruments within a wrapped tray.
- Do not stack instruments inside the containers. Do not stack containers. Do not stack containers within containers. Do not wrap instruments within the containers.
- Place chemical indicator strips inside trays and pouches as needed.
3.6.4 Loading
The cassette should be precisely installed onto the loading block of the STERLINK® FPS-15s Plus sterilizer. For the CHAMBER mode operation, the packaged devices are recommended to be loaded inside the chamber after loading the cassette (STERLOAD®) for your convenience.
WARNING! DO NOT USE IF PACKAGING IS DAMAGED.
Do not use if the package has been damaged or has not been properly sealed. If the sealing is not perfect, it’s difficult to have confidence of asepsis, and the sterilization process can be cancelled.
CAUTION! INSERT CI (CHEMICAL INDICATOR).
Insert the CI in the packaging together with the product. After the sterilization cycle is completed, you can check if the product is working properly and the CI color has been changed properly.
CAUTION! BE CAREFUL, MAY BE CHAMBER HOT!
The temperature of the chamber may be hot. Wear protective gear and be careful when working inside the chamber and be careful of burns.
Chapter 4. Operation
4.1 Before you start
Each time you use the STERLINK® FPS-15s Plus sterilizer, follow the instructions provided in the chapter 4 “Load preparation.” It is the operator’s responsibility to be familiar with the load preparation and safety information provided in this User manual.
Notes.
- The sterilizer shall be installed on the table. When the sterilizer is relocated from the initial place, it shall be relocated by the authorized person from the manufacturer.
- When the user reactivates the sterilizer after long term stop, the user shall contact the manufacturer and take proper instruction
- The LAN connector is used only expert of manufacture. It is intended use for S/W update or diagnosis of product status.
WARNING! HYDROGEN PEROXIDE IS CORROSIVE.
Concentrated hydrogen peroxide is corrosive to skin, eyes, nose, throat, lungs, and the gastrointestinal tract. Always were latex, PVC (vinyl), or nitrile gloves while removing items from the sterilizer following a cancelled cycle or error occurrence. Following a hydrogen peroxide may be present.
WARNING! HYDROGEN PEROXIDE DISPOSAL.
Hydrogen peroxide is designated as dangerous and hazardous medical wastes by American environment protection association and shall be disposed in accordance with the local regulation. (US waste disposal regulation: U.S. EPA 40 CFR 262)
CAUTION! USE ONLY CORD BY SUPPLIER.
If you use a power code/use cable code other than the one provided by our company, there is a risk of equipment malfunction or electric shock.
4.2 Start and warm-up
- Turn on the main power switch which is located at the rear side of the sterilizer.
- Close the door during preheating process for warming up. The warm-up process can take up to 40 minutes.
- After the preheating process, the “Sterilize” icon will appear on the display instead of the “Preheating”.
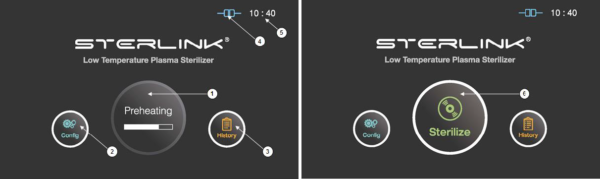
Figure 5.1 GUIs for the preheating and at ready stage
|
Number |
Name |
Description |
|
1 |
Preheating |
For components that require temperature control of chamber or vaporizer, to make the product ready the product will be preheat. |
|
2 |
Configuration |
The display can be moved into the sterilizer’s configuration setup by touching this configuration icon. |
|
3 |
History |
The display can be turned into the sterilization management window by touching this history icon. |
|
4 |
ITS connection |
This section displays the present status of ITSTM connection. |
|
5 |
Time |
The current configurable time is displayed in Configuration menu. |
|
6 |
Sterilize |
The sterilizer starts the sterilization cycle by touching this icon. |
4.3 Preparing the load
Confirming that sterilizing conditions were achieved during a sterilization cycle is one of important part of the sterilization process. Biological indicators are one way to ensure that your sterilizer is operating correctly.
Place a biological indicator in the STERPACK®, STERPACK® Plus or STERLINK® chamber, respectively for the POUCH, POUCH Plus or CHAMBER mode. This biological testing is recommended to be performed at least once per day or specified by your facility’s policy.
While the sterilizer is warming up, you can use this time to prepare the load. Refer to the chapter detailing the load preparation information.
|
Mode |
Item description |
|
POUCH |
Total mass of the items should be less than 0.5 kg. |
|
POUCH Plus |
Total mass of the items should be less than 1.5 kg. |
|
CHAMBER |
Total mass of the items should be less than 5 kg. |
WARNING! POSSIBLE NON-STERILE DEVICE.
Improper sealing of the STERPACK®, STERPACK® Plus for the POUCH, POUCH Plus mode may result in either a non-sterile device or cycle cancellation. Seal tight the STERPACK® by using a recommended sealing machine.
CAUTION! DO NOT REUSE.
The products (STERPACK®, STERPACK® Plus, STERLOAD®) are intended for single use only. Do not reuse, if you reuse the product an error will occur.
CAUTION! CHECK EXPIRY DATE.
When you use the sterilant cassettes (STERPACK®, STERPACK® Plus, STERLOAD®), check the expiry date. If the date is expired, dispose and use new available sterilant cassettes. The use of expired date cassette will occur an error.
CAUTION! HYDROGEN PEROXIDE MAY BE PRESENT.
Wear latex, PVC (vinyl), or nitrile gloves whenever handling a load after a cycle cancellation or error occurrence. Hydrogen peroxide liquid may be present on the load or in the chamber.
4.4 Cassette loading
The STERLINK® FPS-15s Plus sterilizer has three different modes which are operated by using the cassette of the STERPACK®, STERPACK® Plus and STERLOAD®. Place the cassette in the loading block as depicted in the following figure.
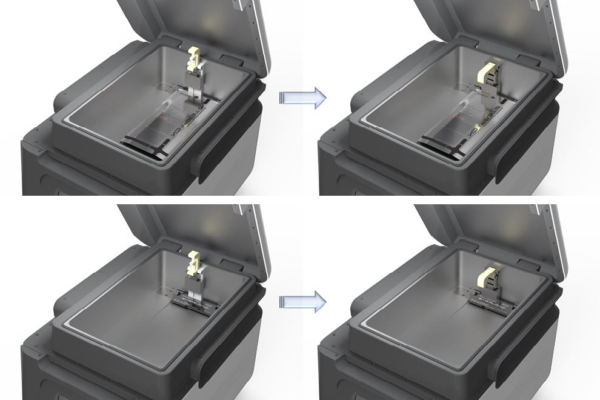
Figure 5.2 Loading cassettes of the STERPACK® and STERLOAD®
WARNING! STERILIZATION SURFACES.
At the end of a cycle, the interior of the sterilizer may be hot. Do not touch the inside of the chamber or door with your bare or gloved hands. Allow the sterilizer to cool before touching interior surfaces.
WARNING! HAND CRUSH HAZARD.
The door of the sterilizer is designed to be manually opened and closed, and your hand can be injured by the door. Keep hands clear when opening or closing the door.
4.5 Starting sterilization cycle
- Check whether the door is closed when the load has been properly placed in the chamber.
- Touch “Sterilize” icon to start sterilization cycle.
- The sterilizer automatically scans the barcode printed on the cassette to check validity of the loaded cassette and determine the operation mode.
- The sterilizer automatically check the door status and start the sterilization cycle.

Figure 5.3 GUIs for the initializing and SRTM process
|
Number |
Name |
Description |
|
7 |
Barcode |
This section displays the barcode scanning result for the cassette loaded. |
|
8 |
Mode |
This represents the sterilization mode determined by the barcode. |
|
9 |
Door |
This section displays the door status. |
|
10 |
Back |
This icon is for cancelling the cycle. |
|
11 |
Mode |
This represents the mode of the sterilization cycle. |
|
12 |
Stop |
This icon is for stopping the cycle which is determined by the user. |
|
13 |
Progress |
This section displays the progress of the SRTM process. |
Notes.
- If the cassette is reused or expired one, it results in cycle cancellation.
- Improper loading of the cassette may result in scanning error, and the cycle will be canceled.
- When the chamber door is not properly closed, it results in cycle cancellation.
- Cycle stop may not obtain sterility assurance level and users can be exposed to residual sterilant which can be left in the cassette. Ensure protective gloves are worn when handling an used cassette.
WARNING! POSSIBLE NON-STERILE DEVICE.
Improper loading of the cassette may result in either a non-sterile device or cycle cancellation. The cassette should be precisely loaded on the cassette loading block of the sterilizer and properly locked.
CAUTION! HYDROGEN PEROXIDE MAY BE PRESENT.
Wear latex, PVC (vinyl), or nitrile gloves whenever handling a load after a cycle cancellation or error occurrence. Hydrogen peroxide liquid may be present on the load or in the chamber.
4.6 Cycle in progress and completed
In the SRTM process, the drying, heating and measuring the residual water are included in the load condition.

Figure 5.4 GUIs for the drying and sterilization process
|
Number |
Name |
Description |
|
14 |
SRTM status |
The status image will be blinking during the drying process |
|
15 |
Sterilization status |
The status image will be blinking during the sterilization process. |
|
16 |
Sterilization time |
The remaining sterilization process time is displayed. |
When the sterilization process is successfully completed, the smart complete (SCTM) process is performed in order to ensure that there is no residual sterilant left on the sterilized instruments. After the relatively short SCTM process, the sterilization cycle is finished with summary of the cycle. Press the confirm switch to return to ready state.

Figure 5.5 GUIs for the SCTM process and completed summary stage
|
Number |
Name |
Description |
|
17 |
SCTM status |
The status image will be blinking during the SCTM process. |
|
18 |
Date |
This section displays the date of the sterilization cycle. |
|
19 |
Cycle time |
This section displays time for overall cycle time. |
|
20 |
Mode |
This section displays the mode of the finished sterilization cycle. |
|
21 |
Result |
This section displays the result of sterilization cycle. |
|
22 |
Confirm |
When the user clicks on ‘Confirm’ button, the screen moves to ready state. |
|
23 |
|
When the user clicks on Print button, the label printer will print out the summary of the sterilization cycle information. |
4.7 Cancelling sterilization cycle
There may be occasions when the user needs to cancel a cycle before it is completed. Touch the “STOP” button, and the screen displays a confirmation message. The user have to confirm the cycle cancellation to stop the cancellation process.

Figure 5.6 GUIs for one of the sterilization process and user confirm
|
Number |
Name |
Description |
|
24 |
STOP |
This icon is for cancelling the cycle. |
|
25 |
Confirm |
This icon is for confirming the cancellation. |
|
26 |
Cancel |
This icon is for withdrawing the cancellation. |
When the cycle cancellation is initiated, it cannot be stopped by the user. Since the sterilization cycle is not properly performed.

Figure 5.7 GUIs for one of the sterilization process and user confirm
|
Number |
Name |
Description |
|
27 |
Caution for door handling |
It highlights that door should not be handled by the user during the stopping process. |
|
28 |
Caution for sterility |
The status image will be blinking during the sterilization process. |
|
29 |
User confirm |
When the user confirm is selected, the screen moves to ready state. |
Even the stopping process includes purification process, sterilant can be left on the loads. Wear protective gloves when handling the load and used cassettes. As depicted in the final GUI, the sterility assurance level may not be obtained, and it requires to restart a new sterilization cycle with rewrapping using new packaging material.
WARNING! POSSIBLE NON-STERILE DEVICE.
Cycle cancellation may result in a non-sterile device, and it requires to restart a new sterilization cycle with rewrapping using new packaging material.
CAUTION! HYDROGEN PEROXIDE MAY BE PRESENT.
Wear latex, PVC (vinyl), or nitrile gloves whenever handling a load after a cycle cancellation or error occurrence. Hydrogen peroxide liquid may be present on the load or in the chamber.
4.8 Processing a sterilized load
When you confirm the completed cycle, the sterilized load can be processed by inspecting the chemical indicators and by processing the biological indicator.
4.8.1 Inspecting chemical indicator
After ensuring that the chemical indicators exhibit the correct color change, and the cycle printout shows that all parameters were met, the sterilized load is ready for immediate use, following your facility’s policy. If the chemical indicators do not exhibit the correct color change, investigate the cause and repackage and reprocess the load.
4.8.2 Processing self-contained biological indicator
Remove the biological indicator from the load and process it according to its Instruction for use. Refer to the biological indicator flow chart on the following pages.
Chapter 5. Access levels and supervisor tasks
5.1 Overview
The STERLINK® FPS-15s Plus sterilizer utilizes the embedded software for automated implementation of the STERLINK® sterilization process. This chapter contains how to control the configuration of STERLINK® FPS-15s Plus low temperature plasma sterilizer.
Users with supervisor-level access authorities (see below) are permitted to perform a set of restricted sterilizer functions. These functions are not used in daily sterilizer operation and some of them are designed to control access, manage system records, and perform advanced diagnostic functions.
5.2 Access levels
The STERLINK® FPS-15s Plus sterilizer can be configured to require that the users enter a valid password in order to control the system configuration. There are three levels of access available. Each is associated with a different subset of permitted operations.
Operator-level access is designed to permit a user to perform tasks associated with the daily operation of the sterilizer. These authorities allow a user to:
- Start and cancel a cycle.
- Print a cycle history report and view cycle history files.
- Setup the display and sound.
Supervisor-level access includes all of the authorities of Operator-level access and additionally provides the ability to:
- Run diagnostic tests
- Perform Calibration for the sensors
- Perform emergency action function
- Setup system time
Service-level access is only for use by the Plasmapp Customer Service Representatives.
- Software update
- Modify the process parameters
5.3 Additional utility menu
The Additional utilities menu in the “Configuration” is available to users with Supervisor or Service-level access authorities. The Additional utilities menu allows supervisors to configure the time setting, sterilizer system setting, and diagnostic test.
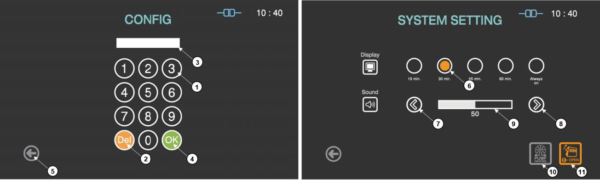
Figure 6.1 GUISs for configuration and system setting
|
Number |
Name |
Description |
|
1 |
Number key |
The number keys are provided for entering password and system setting. |
|
2 |
Del key |
The key is for deleting the number entered. |
|
3 |
Password display |
This section displays the password entered. The default setting for the password is “1111”. |
|
4 |
OK key |
The key is for confirming the password. |
|
5 |
Back |
This icon is for going back to the user screen for ready. |
|
6 |
Display selection |
The display time for the screen saver can be selected by touching the circle icon. |
|
7 |
Plus key |
The sound volume can be increased by touching this plus key. |
|
8 |
Minus key |
The sound volume can be decreased by touching this plus key. |
|
9 |
Sound bar |
The sound bar displays the established volume. |
|
10 |
Door open |
When the door of the sterilizer can not be opened, this function can open the door urgently. |
|
11 |
Pump Heating |
When the ambient temperature is low or the product is not used for long time, this function can start the preheating of vacuum pump. |
Chapter 6. Reports and files
6.1 Reports
The cycle report is automatically created and displayed by the STERLINK® FPS-15s Plus sterilizer when the sterilization cycle is completed. The displayed report summarizes the cycle information of the cycle date, time, process mode and the result of the sterilization cycle.

Figure 7.1 GUIs of cycle summary when the cycle is passed and failed
|
Number |
Name |
Description |
|
1 |
Date |
This section displays the date of the sterilization cycle. |
|
2 |
Cycle time |
This section displays time for overall cycle time. |
|
3 |
Mode |
This section displays the mode of the finished sterilization cycle. |
|
4 |
Result |
This section displays the result of sterilization cycle. |
|
5 |
User confirm |
When the user confirm is selected, the screen moves to ready state. |
|
6 |
|
When the print is selected, the label printer will print out the summary of the sterilization cycle information. |
|
7 |
Caution |
This section describes caution information when the sterilization fails. |
6.2 Data
The STERLINK® FPS-15s Plus sterilizer can create, store, display, and print the cycle data. When connected to internet, the sterilizer can upload the cycle history files to the ITSTM server. Cycle history data contains very detailed sterilization cycle information of each SRTM, sterilization and SCTM process. The data includes identifying information about the sterilizer, time, date, cycle duration information, process data from the sensors of the sterilizer. Information is extracted from the cycle history data to produce the printed report.
The history data is stored in the memory of the STERLINK® FPS-15s Plus sterilizer. The memory holds data form the last 50 cycles. After 50 cycles are completed, the oldest cycle history record is overwritten with new data from the 51st cycle. If the sterilizer is configured with internet connection to ITSTM server, the cycle history data can be periodically uploaded to the server.
Chapter 7. Maintenance
The STERLINK® FPS-15s Plus sterilizer is the highest quality sterilizer that performs reliable sterilization cycles. As the sterilizer may be deteriorated by continuous usages, the sterilizer also needs proper maintenance to guarantee user safety and reliable sterilization cycle. This chapter describes what kind of works and parts are required for the maintenance of the STERLINK® FPS-15s Plus sterilization system.
7.1 Manual maintenance
The following maintenance procedures are performed by the user, when needed:
- Cleaning sterilizer exterior and interior chamber
- Replacing printer paper
- Routine sterilizer maintenance
Notes.
- Repairs and adjustments should only be attempted by experienced technicians who are fully trained to maintain and repair the STERLINK® FPS-15s Plus sterilizer.
- Use of unauthorized parts for maintenance or repair could cause personal injury, result in costly damage, or sterilizer malfunction and voids the warranty.
7.1.1 Cleaning the sterilizer exterior and interior chamber
The sterilizer exterior can be cleaned with a soft cloth and a mild, nonabrasive detergent solution if necessary. When cleaning the sterilizer exterior, follow the guidelines:
- Turn off the power to the sterilizer before cleaning the exterior.
- Never allow cleaning solution or water to enter the interior or chamber. Moisten a cloth with nonabrasive detergent solution and use the damp cloth to clean the surfaces.
- Do not spray cleaning solution directly on the touch screen. Use a dampened cloth to clean the screen.
The sterilizer interior chamber can be cleaned with a soft cloth or damp soft cloth with no running water. When cleaning the sterilizer interior chamber, follow the guidelines.
- Turn off the power of the sterilizer before cleaning the interior chamber.
- Wait until the interior chamber has cooled down.
- Never allow cleaning solution or water to enter the interior or chamber. Use only dry or damp cloth to gently clean the surface of the interior chamber.
- Wait until the interior chamber is completely dry before staring the sterilizer.
Notes.
- When a user attempt to clean the chamber, door, or interior surface, the user must wear gloves and follow the guidelines.
- Failure to follow the guidelines may result in damage to the sterilizer and may void the warranty.
 WARNING! STERILIZATION SURFACES.
At the end of a cycle, the interior of the sterilizer may be hot. Do not touch the inside of the chamber or door with your bare or gloved hands. Allow the sterilizer to cool before touching interior surfaces.
 WARNING! HAND CRUSH HAZARD.
The door of the sterilizer is designed to be manually opened and closed, and your hand can be injured by the door. Keep hands clear.
CAUTION! POSSIBLE DAMAGE ON THE STERILIZER.
Do not use the steel brush (wire brush), steel foam (steel wool), compound and detergent containing chloride compound. They may damage the sterilizer or its electrodes. Please remove all detergent, fabric or thread left in the chamber after cleaning.
CAUTION! HYDROGEN PEROXIDE MAY BE PRESENT.
Wear latex, PVC (vinyl), or nitrile gloves whenever handling a load after a cycle cancellation or error occurrence. Hydrogen peroxide liquid may be present on the load or in the chamber.
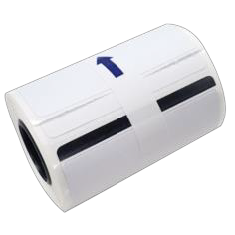
7.1.2 Replacing label-printer paper
When the label-printer roll is empty, the roll is required to be replaced manually as following.
- Holding the body push the top of the front cover to disengage the front cover to reveal the label-printer roll.
- Remove by pulling out the roll.
- Insert new label-printer roll and close the front cover.
7.1.3 Routine sterilizer maintenance
The usage level of each registered sterilizer will be indicated in the user registered ITSTM system. When the usage level suggests for sterilizer maintenance, please contact your local Plasmapp customer support representative.
7.2 Sterilant cassettes
Hydrogen peroxide (Chemical Formula: H2O2) in the cassettes of STERPACK®, STERPACK® Plus and STERLOAD® is designated as dangerous and hazardous waste by American Environment Protection Association and shall be disposed in accordance with the local regulation. (US waste disposal regulation: U.S. EPA 40 CFR 262.). The cassettes are NOT medical devices and should be purchased separately from STERLINK®.
CAUTION! HYDROGEN PEROXIDE MAY BE PRESENT.
If a cycle cancels and the items in the load appear wet, hydrogen peroxide may be present. Wear latex, PVC (vinyl), or nitrile gloves while removing the items from the chamber and wiping off the items with a damp cloth.
7.3 Moving, long term stop and disposal of the sterilizer
When the STERLINK® FPS-15s Plus sterilizer system is reinstalled from initial place to the another, the system shall be moved by the authorized technicians. If there is no continuous sterilization cycle, it is required to turn off the power switch of the sterilizer and pull out the power cord from the power outlet with following storage condition.
|
Name |
Value |
|
Humidity |
30-85% |
|
Atmosphere pressure |
70–106 kPa |
|
Temperature |
10-40℃ |
When the system is reactivated after long stop, the user shall contact the manufacturer of the sterilization system and the authorized person of the manufacturer to take a proper instruction. Moreover, the equipment shall not be reinstalled where the power cord is difficult to handle.
In the event that disposal of the system is necessary, the system may be return to the manufacturer, recycled with a local recycler, or disposed of in a local landfill. Disposal of infectious waste and electronic circuit boards are regulated by the U.S. Environment Protection Agency and most international environmental agencies. Please contact Plasmapp or your local Plasmapp customer support representative for additional information.
Chapter 8. Troubleshooting
Most sterilizer operating problems are accompanied by a system message. These messages are useful in determining the source of the problem. In many cases you can take remedial actions to correct the source of the problem and thereby return the sterilizer to normal operation. In other cases, the problem is caused by a component failure that requires adjustment or repair by the manufacturer or the local Plasmapp customer support representative. If you are unable to identify the cause and solve the problem, please contact Plasmapp or your local Plasmapp customer support representative.
8.1 System features
The STERLINK® FPS-15s Plus sterilizer system can perform the fully automated sterilization cycle. The system can display self-status with LED light of green, blue, and red at the following status.
|
LED Color |
System status |
|
Green |
Ready for the sterilization (Blinking during preheating process) |
|
Blue |
Sterilization cycle is completed. (Blinking during sterilization cycle) |
|
Red |
Blinking when the error occurs. |
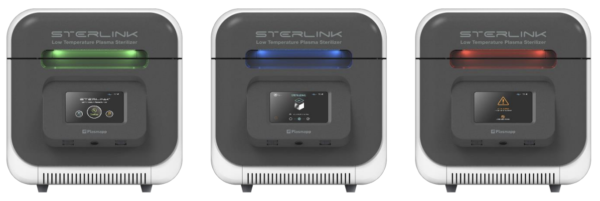
Figure 8.1 Sterilizer status with different LED colors
8.2 Software update
The STERLINK® FPS-15s Plus sterilization system will be automatically updated by the Plasmapp when the user confirms this update. If the system finds a new software version at the ITSTM server, the following alarm will be popped up when the system is restarted.
When the user confirms this software update, it will take several minutes for completing the update and the system will be rebooted when completed. The update may be failed by the unstable internet connection and can be postponed depending on the user.

Figure 8.2 GUIs for software update confirm and updating
|
Number |
Name |
Description |
|
1 |
Confirm |
This icon is for confirming the software update. |
|
2 |
Cancel |
This icon is for postponing the software update. |
CAUTION! POSSIBLE DAMAGE ON THE STERILIZER.
The power-off during the software update may damage the sterilizer system. If it happens, contact the local Plasmapp customer service representative.
8.3 User errors
The STERLINK® FPS-15s Plus sterilization system is designed to provide alarm messages with the intuitive figures representing the predictable source for the user errors. When the user confirms, the error should be checked and understood by the user. If the problems persist, please contact Plasmapp or local Plasmapp customer service representative.

Figure 9.3 GUIs for user errors
|
Number |
Name |
Description |
|
3 |
Confirm |
The user should confirm the error when the source of the problem is checked and understood. |
|
4 |
DOOR NOT CLOSED |
Probable cause: The door is not closed. Suggestion: Check door closing and try again. |
|
5 |
INCOMPLETE SEALING |
Probable cause: The STERPACK® and STERPACK® Plus sealing is not properly performed. Suggestion: Re-seal tightly and try again. |
|
6 |
DESCRIPTION |
Describes the causes and solutions of the problems. |
“Incomplete sealing” error may occur when the pouch is damaged by sharp medical device in POUCH mode. It is recommended to use the exclusive tray.
8.4 Sterilant cassette errors
The STERLINK® FPS-15s Plus sterilization system is designed to initiate automatically the sterilization cycle according to the barcode information provided by the sterilant cassettes. The predictable error source is presented with the intuitive figures, and the user should identify the source and confirm. If the problems persist, contact local Plasmapp customer service representative.
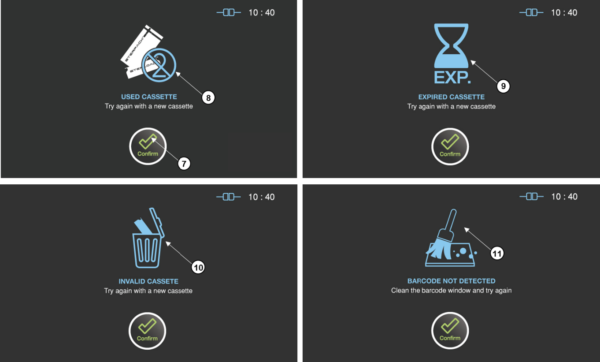
Figure 8.4 GUIs for the errors related with the sterilant cassettes
|
Number |
Name |
Description |
|
7 |
Confirm |
The user should confirm the reason of the error and press Confirm button. |
|
8 |
USED CASSETTE |
Probable cause: The used cassette is tried to be reused. Suggestion: Try again with a new cassette. |
|
9 |
EXPIRED CASSETTE |
Probable cause: The expired cassette is tried to be used. Suggestion: Try again with a new cassette or check time setting. |
|
10 |
INVALID CASSETTE |
Probable cause: The barcode of the cassette is invalid. Suggestion: Try again with a new cassette. |
|
11 |
BARCODE NOT DETECTED |
Probable cause: The cassette is not detected. Suggestion: Clean the barcode window or try again. |
8.5 Other system errors
Many system errors are incorporated with the problems with the loads, but the STERLINK® FPS- 15s Plus sterilization system also can have a problem resulting from a component failure. If the problems persist, contact Plasmapp or local Plasmapp customer service representative.
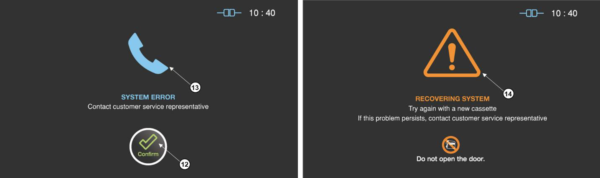
Figure 8.6 GUIs for the system errors
|
Number |
Name |
Description |
|
12 |
Confirm |
The user can confirm this system error after contacting customer service representative. |
|
13 |
SYSTEM ERROR |
Probable cause: A component failure results in preheating error. Suggestion: Contact the customer service or restart the system. |
|
14 |
SYSTEM STABILIZING |
Probable cause: A component failure results in completing the cycle. Suggestion: Wait until recovering system and try again. |
Note.
- Repairs and adjustments should only be made by the trained and authorized personnel.
- When the door cannot be opened after sterilization cycle, please refer to the Section 6.3 featuring “Additional utility menu” for the user to temporarily open the door. If the problems persist, contact your local Plasmapp customer support representative.
If the power of sterilization system is abnormally shut off during the sterilization process, the following screen will appear. To ensure user safety, the purification process will be active it can take from a few minutes to tens of minutes, after the status will be ready. Even the purification is well done, you can find the residual sterilant.

WARNING! POSSIBLE NON-STERILE DEVICE.
Any error may result in a non-sterile medical device, and it requires to restart a new sterilization cycle with rewrapping using new packaging material.
CAUTION! HYDROGEN PEROXIDE MAY BE PRESENT.
Any error may result in failure of removing hydrogen peroxide. Wear latex, PVC (vinyl), or nitrile gloves when handling the loads and cassette.
Attachment A. Warranty
- The manufacturer of Plasmapp Co., Ltd. warrants the product of STERLINK® FPS-15s Plus sterilizer to be free from defects in materials and workmanship for a period of one year from the delivery date.
- For any defects found in manufacturing or in normal use, the warranty can be applied. To be eligible for the warranty, the defects should be identified and notified to the manufacturer.
- The warranty does not apply to repairs or replacements required because of accident, misuse, neglect, failure to maintain in accordance with the manufacturer’s specification, or cause other than ordinary use.
- For (i) any portion of the product modified after the delivery; (ii) where the serial numbers have been removed or altered after the delivery; (iii) where the recommended operating and maintenance procedures have not been followed; (iv) to normal wear and tear; (v) damage due natural disasters or fire, the warranty does not apply.
- Even if the warranty period is available but not within the scope of the warranty, all reparations can be done with additional fees.
Youbong Lim, CEO of Plasmapp. Co,. Ltd.
Attachment B. Sterilant cassettes, Consumables and Accessories
B1. Sterilant cassettes
|
Name |
Description / Specifications |
Figure |
|
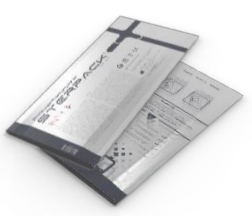
STERPACK® |
Impermeable pouch containing sterilant for POUCH mode
|
 |
|
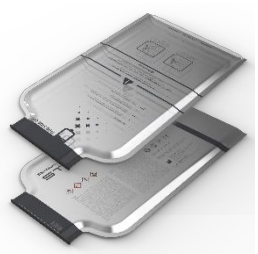
STERPACK® Plus |
Impermeable pouch containing sterilant for POUCH Plus mode
|
 |
|
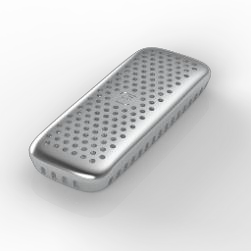
STERLOAD® |
Cassette containing sterilant for CHAMBER mode
|
 |
B2. Consumables
|
Name |
Description / Specifications |
Figure |
|
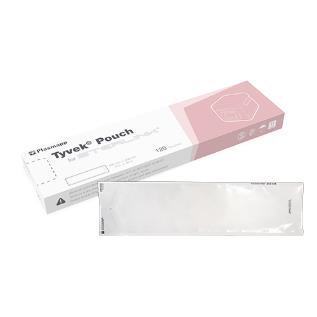
Tyvek® pouch (W100) |
Device sterile packaging pouch for CHAMBER mode
|
 |
|
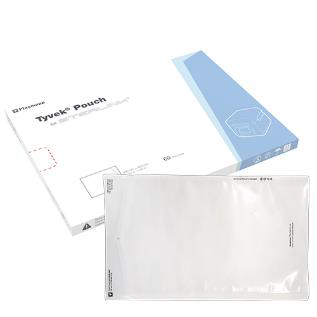
Tyvek® pouch (W200) |
Device sterile packaging pouch for CHAMBER mode
|
 |
|
Tyvek® pouch (W300) |
Device sterile packaging pouch for CHAMBER mode
|
 |
B3. Special tray
|
Name |
Description / Specifications |
Figure |
|
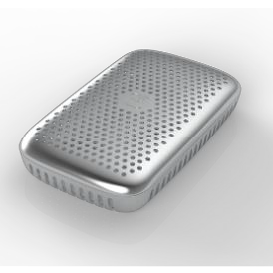
Chamber Tray |
Chamber Inner Tray – Size: 250 mm× 350 mm× 105 mm
|
 |
|
STERPACK® Tray |
Special vacuum tray for STERPACK®
|
 |
|
STERPACK® Plus Tray |
Special vacuum tray for STERPACK® Plus – Size: 160 mm× 260 mm× 50 mm
|
 |
B4. Accessories
|
Name |
Description / Specifications |
Figure |
|
Special Cart |
Cart with locking wheel – Size: 483 mm × 660 mm × 603 mm
|
 |
|
Label-Printer |
External thermal printer – Size: 120 mm × 102 mm × 146 mm
|
 |
|
Label Sticker Roll |
Label sticker roll for label-printer
|
 |
|
Chemical indicator tape |
Chemical indicator for sterilization cycle monitor
|
 |
|
Chemical indicator strip |
Chemical indicator for sterilization cycle monitor
|
 |
Attachment C. Specifications
C1. General information
1. Product name: Low temperature plasma sterilizer
2. Model: STERLINK® FPS-15s Plus
3. Manufacturer
|
Company |
Plasmapp Co., Ltd. |
|
Address |
83, Jukdong-ro, Yuseong-gu, Daejeon, 34127, Republic of Korea |
|
Tel |
+82-42-716-2115 |
|
Fax |
+82-42-716-2116 |
|
Website |
4. Manufacturing business license number: 5307 (MDITAC, Republic of Korea)
5. Medical device manufacturing permit number: 17-4579 (MDITAC, Republic of Korea)
6. Serial number and manufacturing date
- Serial number: Declared after manufacturing
- Manufacturing date: Declared after manufacturing
7. European certification body
|
Company |
MTIC InterCert S.r.l |
|
Address |
Via G. Leopardi, 14, 20123 Milano (MI), Italy |
|
Tel |
+39 02 97071800 |
|
Fax |
+39 02 9308176 |
|
Website |
C2. Technical specification
|
Description |
Unit |
|||
|
Dimensions |
433 (W) × 614 (D) × 437 (H) |
mm |
||
|
Effective chamber volume |
14 |
liter |
||
|
Cycle time |
POUCH mode |
SRTM / SCTM Process |
3 |
min |
|
Sterilization Process |
4 |
|||
|
Overall Cycle |
7 |
|||
|
POUCH Plus mode |
SRTM / SCTM Process |
6 |
||
|
Sterilization Process |
8 |
|||
|
Overall Cycle |
14 |
|||
|
CHAMBER mode |
SRTM / SCTM Process |
21 |
||
|
Sterilization Process |
15 |
|||
|
Overall Cycle |
36 |
|||
|
Sterilization |
Sterilant: Hydrogen peroxide (concentration: 58%) Injection / penetration, diffusion and purification by plasma |
|||
|
Sterilizing pressure |
Final vacuum pressure |
< 3.0 |
torr |
|
|
Vacuum leakage |
< 0.1 |
torr/sec |
||
|
Pressure range |
0.0 – 760 |
torr |
||
|
Cycle temperature |
< 56 |
oC |
||
|
Display |
7” TFT LCD touch screen |
|||
|
Power input |
100-120 / 220-240 VAC, 50/60 Hz |
|||
|
Max. power consumption |
1.0 |
kVA |
||
|
Electrical shock class |
Class 1 (Protection standard and class for electrical shock) |
|||
|
Life cycle |
15 years |
|||
User manual for the STERLINK® FPS-15s Plus sterilization system
Manufacturer: Plasmapp Co., Ltd.
83, Jukdong-ro, Youseong-gu, Daejeon, 34127
Republic of Korea Website: http://www.plasmapp.co.kr
TEL: +82-42-716-2115
FAX: +82-42-716-2116
Authorized US representative: Vetovation Inc.
Raleigh, NC
Website: http://www.vetovation.com
TEL: 919-247-0328